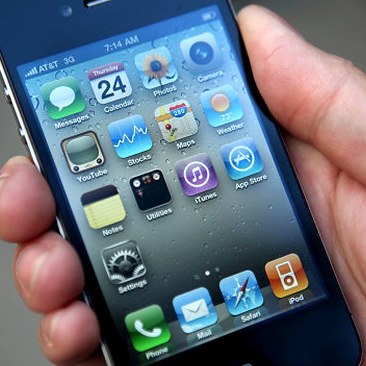
Recent years have sign a continual growth in new and amazing web technologies.
Applications have been developed to make communication easier, to share media, and to provide endless amounts of information to people looking for it.
Adobe has been so impressed with the web technologies that have been developed that they developed a way to bring all these web technologies to the desktop. Adobe Air does just that.
One of Adobe Air’s strengths is that it allows developers to write code that works on all operating systems… Windows, OS X, and more.
If you’d like to check out Adobe Air, head over to the Adobe product website to download the technology that will allow multiple applications built on web technologies to run on OS X desktop.

After you’ve installed Adobe Air. I suggest trying out Twhirl, an Adobe Air application that brings your twitter experience to your desktop.

Additionally, Twhirl adds some basic functionality to make sending Twits to your friends and followers as well as make some as favorites. Send links, pictures, and your basic twits without having to launch Safari.
One of Apple’s major announcements over the past few years was their move from PowerPC processors to Intel X86 based processors. This was such a huge announcement because it essentially meant that there was very little that was keeping people from running Windows on their Apple computers.
But who really wants to buy a Mac just to run Windows on it? Very few people. On the other hand, there is a significantly large number of people that want to run a Windows application or two at times.
Shortly after the announcement of the change in hardware, Parallels released software that allowed you to quickly launch virtual machines inside of OS X. Essentially, users now had the ability to get to their Windows applications quickly and easily on their Mac.
While Parallels allows you to mix and mingle your OS X and Windows applications it may be nice to keep them separated. This is where the 10.5 addition of Spaces makes a great software addition.
How To Launch Windows In Its Own Space
To be able to launch Windows in its own Space the first thing you have to do is download and install Parallels. There is a free 15 day trial available from their website so you can try out the software before putting down any cash.
After you’ve installed Parallels you’ll need to install your Windows software (Either XP or Vista). Doing so in Parallels is quick and easy but you must have an .ISO image or CD for the Windows OS you’ll be using.
Follow the instructions to setup your Virtual Machine and then follow the onscreen instructions for installing Windows. Once Windows has finished installing your Parallels Virtual Machine will boot up into Windows.
Next we need to setup Parallels so it always opens in its own space. To do so follow the same steps we provided in Setting Up Applications to Launch in Their Own Space:
- Click the Apple Icon and Open System Preferences
- Select Expose and Spaces and then the Spaces Tab
- Click the + Button Below the Application Assignments Table
- Select Parallels and then Assign it to the Space you’d like to designate to Windows
When you’ve finished this, your open Parallels Windows Virtual Machine will move to the space you assigned it.
Navigate to that Space with a keyboard shortcut (I assigned to space 3 so cmd+3) and you’ll see your Windows VM. Select View and then Full Screen, and Windows will open to full screen mode.

At this point you’ve now assigned your Windows Machine to its own Space. It should open in Full Screen mode anytime you go to access it, and now switching to Windows is as easy as a keyboard shortcut.
Move back to a different Space with keyboard shortcuts or select a different open application with Command + Tab.
How are you using Windows in OS X?
With iPhoto 08 Apple included a number of enhancements and adjustments to the way that users view their photo library in iPhoto. Instead of having one library that stored all your photos, there are now divided up by Events.
I personally have found this a great enhancement to the organization capabilities of iPhoto. It was becoming more and more difficult to find the photos I was looking for and I wasn’t a big fan of needing to create an Album for each set of pictures I wanted to keep together.
Events solved that problem for me. And with that solution they also provide a way to keep those events organized in a way that makes the most sense to you.
Sort Events in iPhoto
If you aren’t satisfied with the way that iPhoto sorted your photos into events after the initial upgrade to iPhoto 08 then follow these few steps to get things organized just the way you want them:
- Open iPhoto 08 and select Events
- On the menu bar select View and then Sort Events
- From there you can select to sort by Date, Keyword, Title, Rating, or Manually. Additionally you can mark the sort Ascending or Descending.
Select the Event Picture
Now that you have the events organized the way you like, you may want to add a final touch to each event so that it really represents the pictures all grouped together.
Move your mouse from horizontally across the event to quickly browse the pictures included. Stop when you find the picture that you feel represents the event the best and hit the SPACE BAR. This will instantly mark that picture as the picture to display for the event.
There have been a number of recent articles describing the way that consumers user their iPhone. Interestingly enough, compared to normal smartphone users iPhone users talk less and browse the web more then their counterparts.
In fact:
“iPhone owners spend the time they use their iPhones engaged in voice calls (that number is 71.7 percent for BlackBerry owners). Also, iPhone owners in the US claim to spend 12.1 percent of their iPhone time on the net (compare that to 2.4 percent for all other mobile phones on average)”
Sync Safari Bookmarks From Your Mac to Your iPhone & iPod Touch
If you find yourself using your iPhone and iPod Touch to browse the web more and more each day then be sure to setup your iPhone/iPod Touch to sync your Safari Bookmarks.
- Open iTunes and connect your iPhone/iPod Touch
- Select the iPhone/iPod Touch in iTunes
- Select the info Tab
- Scroll Down to Web Browser and check the box next to Sync Safari Bookmarks
- Click Sync and check your iPhone/iPod Touch for the updated Bookmark list

Discover interesting sites while on the go and able to check back on them when you return to the larger screen comfort of your Mac. Taking your bookmarks with you has never been easier.
One of the main features that Apple has advertised with their new Macbook Air and Macbook Pro notebooks is the increased capabilities of the trackpad included with the machines.
With the new trackpad applications like iPhoto and Safari received additional navigation capabilities based on gestures conducted on the trackpad.
Safari includes trackpad capabilities that allowed you to touch three fingers to your trackpad and swipe them to the left or right and the browser will move forward or back a page based on your gesture.
Additionally gestures provided ways to zoom in on the screen, rotate pictures or scroll around the page view. Unfortunately, these new gestures do not include commands for all applications. You couldn’t use the same trackpad features to navigate in Firefox that you used in Safari.
That is until Will Henderson released his beta software that he has titled “MultiClutch“.
Multiclutch
MultiClutch is a small program that installs a system preference window that allows you to tie keyboard shortcut commands to your trackpad gestures.
Connecting the gestures to commands within an application is quick and simple:
- After you’ve downloaded and installed MultiClutch, navigate to the System Preferences on your Mac and click MultiClutch in the “Other” section.
- Click the ‘+’ to add an application, select the application you’d like to add a gesture command to
- Select the application in the MultiClutch menu and then click the ‘+’ below the Gesture/Key Command section
- Select the gesture command you’d like to use and then click the keyboard shortcut and press the keys you’d like to be tied to the trackpad gesture. (To view the keyboard shortcuts for an application, open the app and select the menu items to see what keyboard shortcuts are tied to the various menu commands
- Close the system preferences, open the application and test the new gesture.
Now with MultiClutch and the new Firefox 3 beta 5 I can add the trackpad gestures I use in Safari to move forward and backwards with the websites I’m viewing.
Note: Currently only applications built with Cocoa are supported. If the gestures are not working there is a high likelihood the application was built in Carbon. Firefox Users should note that the MultiClutch gestures were tested in Firefox 3 beta 5 and worked correctly. They did not work in Firefox 2.


