Quick Answer:
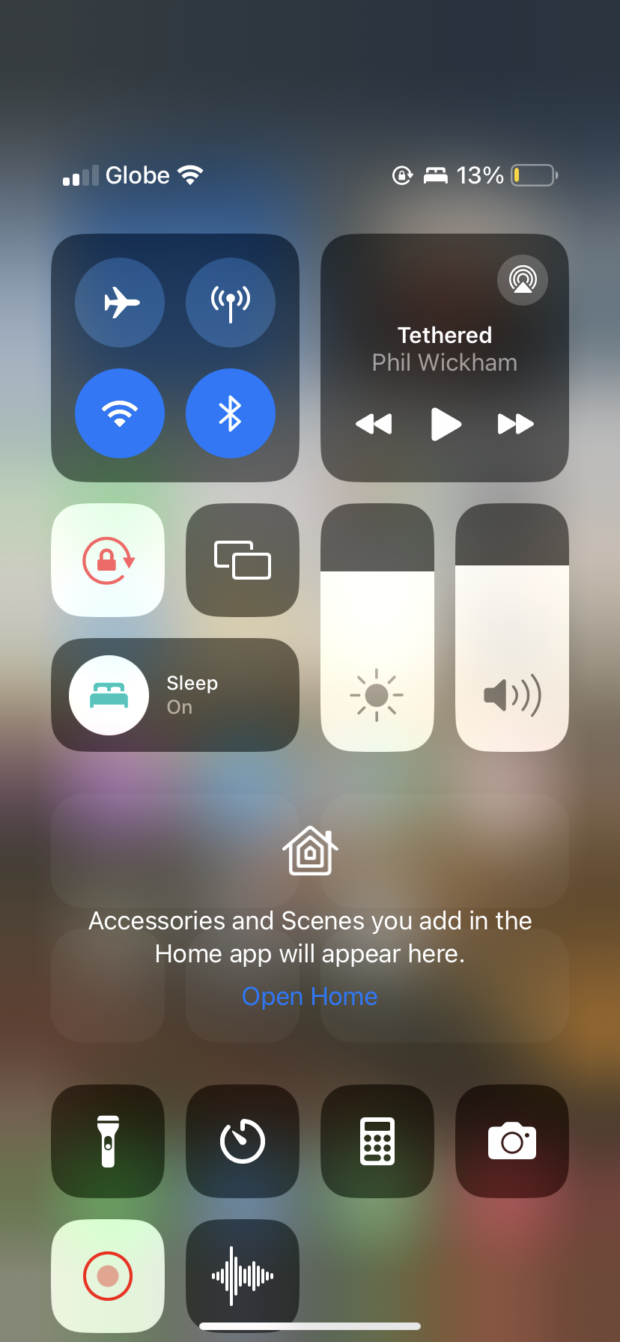
To set up screen recording on your iPhone, go to Settings > Control Center and add Screen Recording. Then, swipe to access the Control Center and tap the Screen Recording button to start recording.
Why Use iPhone Screen Recording?
Screen recording on your iPhone is a versatile tool that can enhance productivity, communication, and creativity. Here are some key use cases:
- Demonstrating a Process:
Record tutorials or walkthroughs for apps and share them with friends or colleagues. - Recording Errors or Bugs:
Capture software issues and share them for troubleshooting. - Demonstrating New Features:
Create engaging videos to showcase new app features or updates. - App Store Preview Videos:
Highlight your app’s functionality with a visually appealing preview. - Providing Feedback:
Record your screen to provide visual feedback on apps or processes. - Recording Gameplay:
Share gaming moments and achievements with your community.
Compatibility and Prerequisites
Before using the screen recording feature, ensure your iPhone meets the following criteria:
- Compatible Devices:
iPhone models running iOS 11 or later versions support screen recording. - Storage Considerations:
Ensure you have enough storage, especially for long recordings, as screen recordings can take up a lot of space.
Step-by-Step Guide: Setting Up Screen Recording
- Enable Screen Recording:
- Open the Settings app.
- Navigate to Control Center.
- Tap Customize Controls and add Screen Recording for quick access.
- Access Control Center:
- Swipe down (or up on older models) to open the Control Center.
- Locate the Screen Recording button.
- Start Recording:
- Tap Screen Recording to start a three-second countdown.
- The red status bar will appear to indicate recording is in progress.
- Customize Audio Settings (Optional):
- Force touch or long-press the Screen Recording button to toggle the microphone and show touches on the screen.
- Stop Recording:
- Tap the red status bar or revisit the Control Center to stop recording.
- Access Your Recorded Video:
- Find your recording in the Recents album or Videos folder in the Photos app.
- Consider backing up your recordings or managing storage regularly.

Tips for Effective Screen Recording
Maximize the quality and professionalism of your screen recordings with these tips:
- Manage Recording Time and Storage:
- Be mindful of recording duration and available storage.
- Clean Up Clutter:
- Organize your home screen for a polished look.
- Enable Do Not Disturb:
- Prevent interruptions by turning on Do Not Disturb mode.
- Lock Orientation:
- Lock screen orientation to avoid accidental rotation during recording.
- Turn Off Display Zoom:
- Disable display zoom to ensure better resolution.
- Unmute Your Device:
- Ensure your device isn’t muted if you want to capture audio.
- Turn Off In-App Music:
- Avoid unwanted audio interference by muting in-app music.
- Free Up Resources:
- Close background apps for optimal performance during recording.
- Create a New Page:
- Set up a dedicated home screen page for distraction-free recording.
- Start with a Script:
- Plan key points or follow a script for a more structured recording.
- Use a Good Microphone:
- Enhance audio quality by using an external microphone.
- Record in a Quiet Place:
- Choose a quiet environment to minimize background noise.
- Enhance with Background Music:
- Add background music for a more engaging experience.
- Trim Recording Edges:
- Polish your video by trimming unnecessary sections.
Conclusion
You’ve successfully set up and used the Screen Recording feature on your iPhone. Whether you’re sharing tutorials, troubleshooting, or showcasing your creativity, screen recording is a powerful tool that enhances your iPhone experience. Start experimenting and make the most of this feature to elevate your content and productivity.
