When Apple released the Macbook Air many questioned their belief that many people no longer need a CD or DVD drive on their notebooks. While others focused on the notebooks lack of ability to quickly play DVD media or import the latest audio CD tracks, I was more concerned with how the notebook would handle the times it needs a fresh OS install.
Apple did provide a custom external DVD drive that would make this process no different than any other notebook but I was interested in how they would handle the approach for individuals like me that didn’t want to pay and extra $99 for the DVD drive.
So, I recently undertook the challenge of reinstalling a fresh version of OS X on my Macbook Air without an external DVD drive.
Apple was successful in making the process simple, but there were a few hiccups along the way. The following details include instructions on how to install OS X on a Macbook Air without an external DVD drive. I’ll discuss the problems I came across at the corresponding step.
How To Reinstall OS X on a Macbook Air Without a DVD Drive
First thing you need to do before you attempt to reinstall OS X is to setup another computer on your network to share their DVD drive with the Macbook Air. Many of you may have done this when you first setup your Macbook Air. After this has been setup you’ll need to insert the OS X disk into the DVD drive and if you’re using a Windows Computer select Remote install OS X or navigate to /Applications/Utilities/ and
launch the Remote Install OS X application.
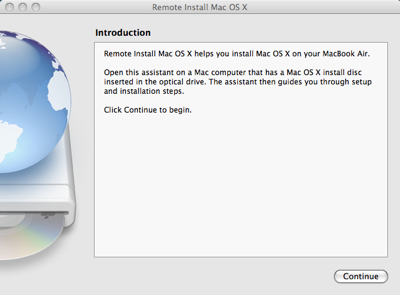
After the application has launched click continue to prepare for the installation.

You’ll next need to select the OS X drive that you previously inserted into your DVD drive on the other computer.
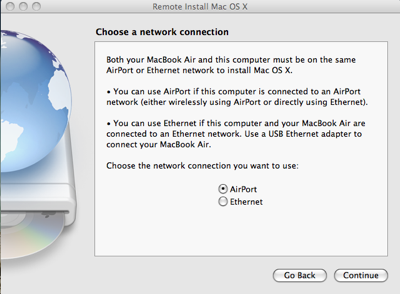
Select if you’d like to connect your computers through an Ethernet setup or over AirPort. If you do not have an Ethernet USB adapter for the Macbook Air you’ll have to select AirPort. The next steps get a bit more complicated.
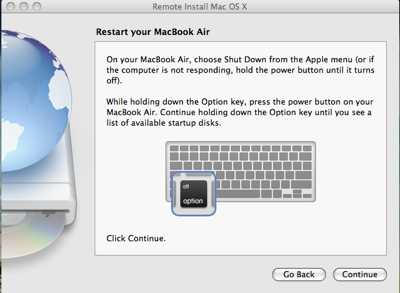
Now that you’ve returned to your Macbook Air, reboot the system and hold down Option until you see a screen that lets you select the boot drive.
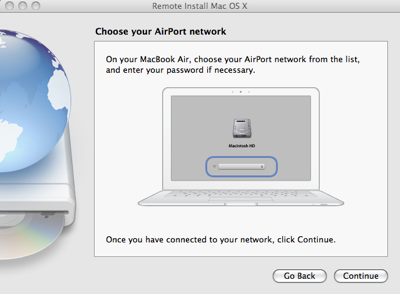
You’ll notice on the screen that you can select the network you’d like to join. You must select the same network that your other computer is on. I could not connect to my wireless network at first but after some trouble shooting I managed to connect the Macbook Air to my home network from the boot screen. I had to disable WEP and any other wireless security encryption before the Macbook Air would find the network.
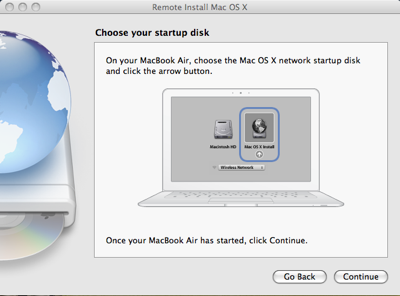
After I found and connected to the network, the OS X disk on my other computer appeared and was a boot option. Select it and continue.
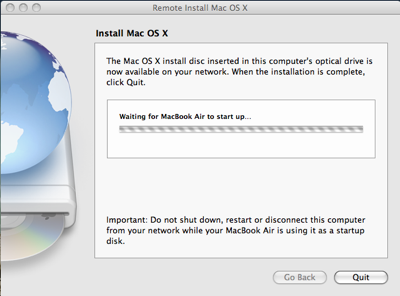
After selecting the DVD for boot the system will restart to that boot device. This may take some time.
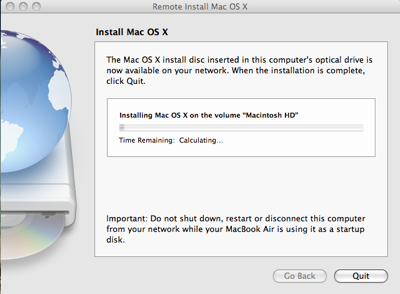
After the system starts you’ll select the language and installation settings (be sure to include the iLife if you would like that included on your Macbook Air) and then the install will begin. This will take a while. It took me close to 4 hours before the installation completed. Obviously this is related to the data transfer limits of a wireless network. If you’re short on time, you may want to look into setting up a USB device that you can install OS X 10.5 from.
The Macbook Air may reboot once or twice during the install and ask for the 2nd DVD if you select to install iLife at this time. Once over thing is complete the computer will restart and be just the way it was when you first purchased it.
Conclusion
While the reinstallation process would be considerably shorter if a DVD drive was somehow included on the Macbook Air, the computer is still capable of easily walking a user through formatting and reinstalling OS X on the notebook. The major difficulties people will have is with connecting to their wireless networks and keeping that connection through the 4 hour install period.
Apple Macbook Air Transparent Black (Smoke) Protective Case Cover
