Are you concerned about the security of sensitive data stored on your Mac? Password protecting a folder can be a crucial step in safeguarding your confidential information. In this guide, we’ll walk you through the process of securing your Mac folders step by step. Whether you’re using built-in tools or exploring third-party options, we’ve got you covered.
Interesting Articles
Using Built-In Tools: Disk Utility
When it comes to password protecting a folder on your Mac, Disk Utility is a valuable built-in tool that gets the job done efficiently. Follow these steps to keep your folders safe:
Step 1: Open Disk Utility
- Begin by launching Disk Utility. You can find it by opening Finder, navigating to “Applications” in the left-side menu, and selecting “Utilities.”
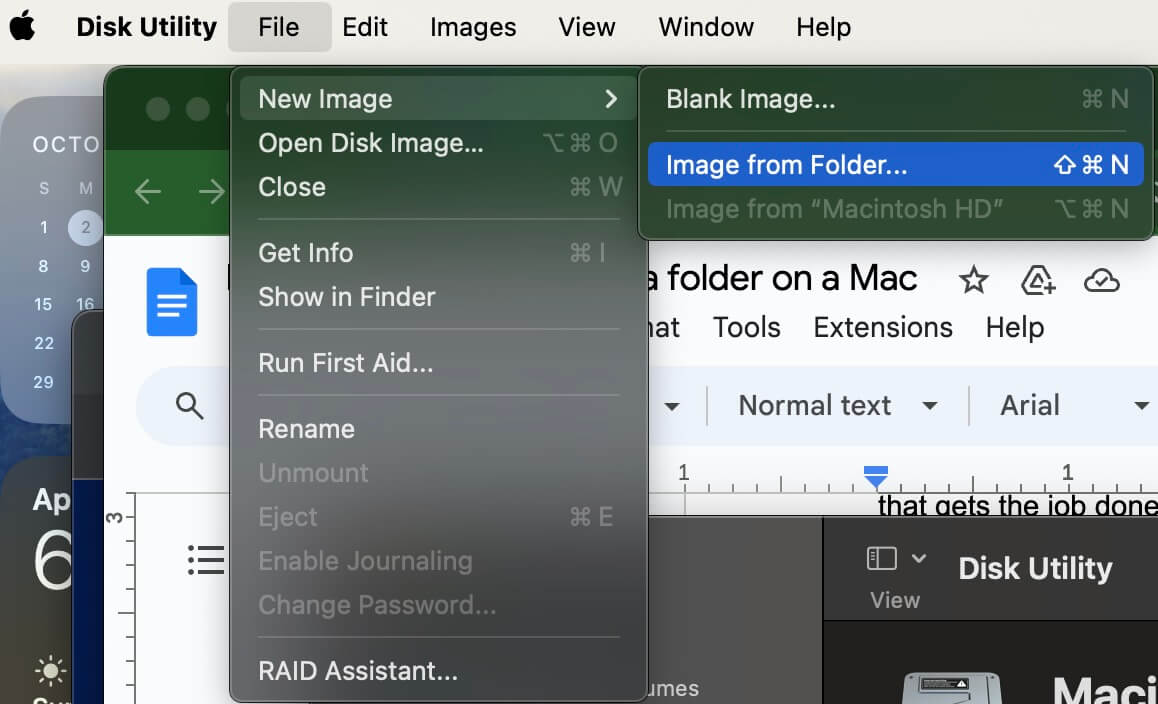
Step 2: Create a New Image from the Folder
- In Disk Utility, click “File” and hover your cursor over “New Image.”
Step 3: Select the Folder to Protect
- Choose the folder you want to protect and click “Choose.”
Step 4: Choose Encryption Level
- In the “Encryption” dropdown menu, select your preferred encryption level: 128-bit AES or 256-bit AES.
- If your data is highly sensitive, opt for 256-bit AES for maximum security. For regular use, 128-bit AES is sufficient.
Step 5: Set Your Password
- Enter the password you want to use to protect the folder.
- Verify the password to ensure accuracy. Consider using strong, unique passwords for added security.
Step 6: Select Read/Write Format
- Under “Image Format,” choose “read/write.” This format allows you to make future edits to the folder.
- Click “Save” to proceed.
Step 7: Wait for Encryption
- Disk Utility will begin encrypting your folder. Wait for the process to complete.
Step 8: Access Your Password-Protected Folder
- Congratulations! You now have a password-protected disk image with a .dmg suffix. To access your folder:
Step 9: Open the Password-Protected Disk Image
- Double-click on the disk image file (with the .dmg suffix).
Step 10: Enter Your Password
- When prompted, enter the password you set during the encryption process.
Step 11: Manage Your Folder
- The disk image will mount, allowing you to move files in and out as needed.
Password Protecting Individual Files (Optional)
In addition to folder protection, you might want to secure individual files. Here’s how you can do it:
- In native Mac apps like Notes, Pages, and Numbers, choose “Files” and then “Set Password” from the menu bar.
- Enter a password and set it.
- For more options, consider third-party tools designed for file-level protection.
Best Practices for Strong Passwords
To enhance your Mac’s security, follow these best practices for creating strong passwords:
- Use a combination of uppercase and lowercase letters, numbers, and symbols.
- Avoid easily guessable information like birthdays or common words.
- Consider using a password manager for secure storage and easy access to your passwords.
Conclusion
You’ve learned how to password protect a folder on your Mac effectively. By following these steps, you can keep your sensitive data safe from prying eyes. Remember, data security is essential, and strong passwords are your first line of defense. Take action today to protect your valuable information.
Explore more security-related content on our website, including guides on encrypting files, protecting PDFs, and resetting passwords. Your Mac’s security is in your hands, and we’re here to help.