Welcome to the intricate world of advanced photo editing in the macOS Photos app. This guide will lead you through a series of steps to enhance your images, helping you unlock the full potential of your photographs.
Interesting articles:
1. Launching and Familiarizing with the Photos App
- Step 1: Start by opening the Photos app. You can find it in your Dock or through the Finder.
- Step 2: Spend some time exploring the interface. Familiarity with the layout, tools, and options will streamline your editing process.
2. Choosing the Right Image
- Step 3: Select an image for editing. Choose a high-quality photo from your library as this will yield the best editing results.
3. Non-Destructive Editing
- Step 4: Begin editing with the peace of mind that all changes you make are non-destructive. This means you can always revert to the original photo if needed.
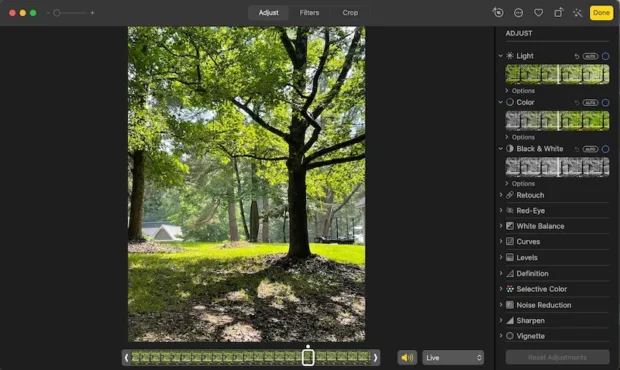
4. Adjusting Lighting and Exposure
- Step 5: In the Photos app, click on the “Adjust” tab.
- Step 6: Use the sliders for Brilliance, Exposure, and Highlights to enhance the lighting and exposure. These tools can dramatically change the mood and detail of your photo.
5. Color Adjustments
- Step 7: Modify the saturation, contrast, and color balance to enrich the colors in your image. This can make your photo more vibrant or give it a more natural look.
- Step 8: For targeted adjustments, use the Selective Color tool. This allows you to pinpoint specific areas in your photo for color correction.
6. Refining Images
- Step 9: Use the sharpening tools to bring out the finer details in your image.
- Step 10: If your photo appears grainy, apply the noise reduction feature to smooth out the texture.
7. Portrait and Landscape Enhancements
- Step 11: For portrait photos, the red-eye removal and retouch tools are invaluable. They help in cleaning up blemishes and enhancing facial features.
- Step 12: In landscape photos, adjusting exposure and saturation can highlight the natural beauty of the scene.
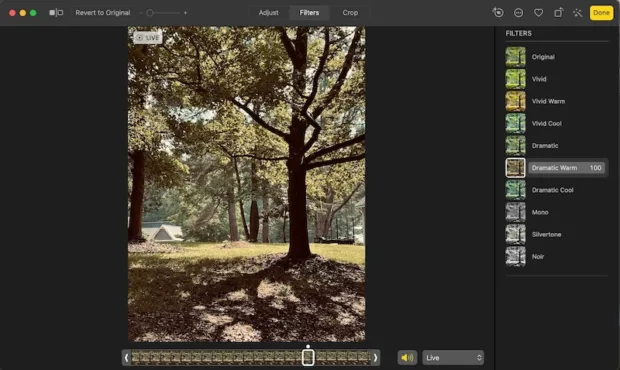
8. Applying Filters and Creating Presets
- Step 13: Experiment with the various filters available in the Photos app. These can be applied to instantly change the photo’s style.
- Step 14: Create custom presets by combining adjustments. This is great for applying a consistent style to multiple photos.
9. Batch Editing for Uniformity
- Step 15: Utilize the copy and paste functionality to apply the same edits across multiple photos. This ensures a uniform look and feel, especially useful for photos from the same shoot or event.
10. Using Extensions for Enhanced Editing
- Step 16: Expand your editing capabilities by integrating third-party tools such as Photolemur and Luminar Neo. These add-ons offer additional features and options for a more enhanced editing experience.
11. Advanced Tips and Tricks
- Step 17: Dive deeper into the Photos app’s functionality. Explore advanced features such as layer management and histogram analysis for a more detailed and professional editing process.
Editing photos on a Mac using the Photos app can be a deeply rewarding experience. With practice and exploration of these advanced techniques, you’ll be able to bring a professional touch to your photos. Don’t hesitate to experiment and find your unique editing style.