One of the worst possible things that can happen to any individual using a Mac is the inadvertent or accidental loss of files. A few years ago my Uncle was working with his Mac and decided that it would be a good time to clean up some files. During the process he accidentally removed all of his MP3s and iTunes purchases. His wife wasn’t to happy.
This type of situation happens too often and thankfully there is software that can help save us from our mistakes. Disk Drill Pro from Clever Files is one such application. Designed to help you recover files you’ve lost, accidentally deleted, or that have become corrupted, Disk Drill Pro is is straight forward and easy to use application.
After downloading and installing the App you’ll be taken through a quick “Training Course” that will help you understand a bit better how File Systems and recovery works. One lesson to remember that its easy to recover lost files if you were prepared for a situation by using their advanced features like Recovery Vault.

Recovery Vault
Disk Drill’s most important feature is Recovery Vault. Recovery Vault allows you to recovery almost anything that is deleted or lost on your Mac. OS X uses a HFS/HFS+ file system that natively tries to completely remove a file from your HD when it is deleted. Often the only information available is its binary structure. This means that the file name other aspects of the file may not be recoverable. However, Disk Drills feature – Recovery Vault is designed to help you recovery everything.
If you want to protect your system from data loss that you can’t recover you need to make sure that you enable Recovery Vault. You won’t be able to enable it after you’ve deleted the important file and your HD has started writing over the areas where your important files were stored.
How to Restore Files with Disk Drill
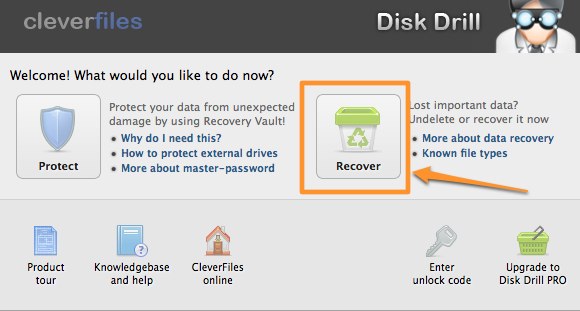
To restore files with Disk Drill you’ll need to launch the application (I use spotlight to quickly find and launch it). When the file is open you’ll need to do the following steps:
- Click the Recover button on Disk Drill
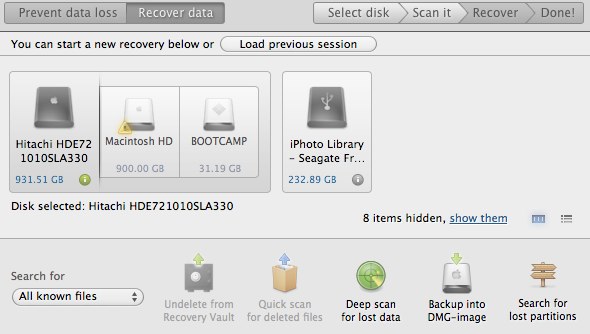
- Next, Select the Hard Drive where the files were deleted. If you have multiple partitions you’ll need to select the specific partition where the file was deleted.
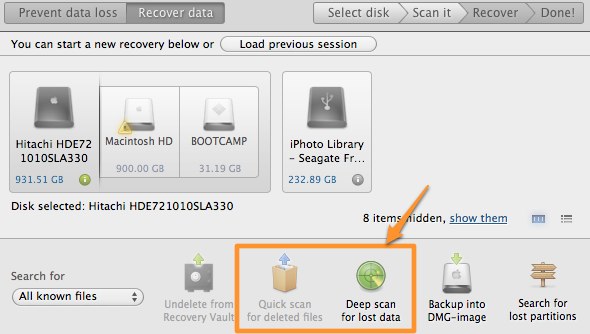
- Select if you’d like to do a quick scan, or if you’d like to do a deep scan for deleted files.
- After you select the level of scan to do, the Disk Drill will look for deleted files and see what it can recover.
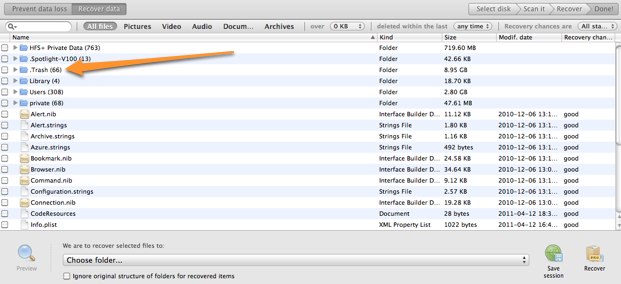
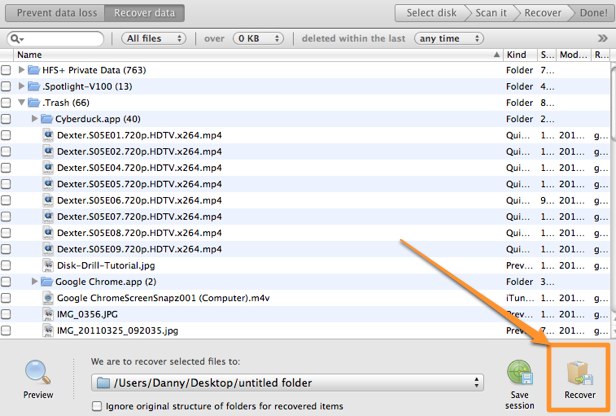
- Once the scan completes, a list of files will appear that Disk Drill discovered. Some of this will look confusing, but if your lost files were deleted and removed from the Trash, then you probably will find them in .Trash.
- Select the files you’d like to recover and then click Recover button.
- When the file finishes recovering to the destination folder you selected it will once again ready for use. NOTE: If you restored it from the .Trash folder it will site in a .Trash folder in the destination location. OS X hides any folder that starts with a . so you’ll need to follow these steps to show the hidden folder.
Conclusion
Disk Drill is a solid app that allows you to quickly recover files you may have accidentally removed from the trash bin. Its Recovery Vault feature also helps protect you from more serious file loss. Head over to CleverFiles to and get a copy to help you recover lost, damaged, or corrupted files.
