If you’re someone who spends a lot of time working on your Mac, we’ve written this article on how to enable dark mode on a Mac just for you. It’s a feature that changes the appearance of your Mac’s user interface from the traditional light background to a darker one.
Interesting Articles
Not only can Dark Mode help reduce eye strain, but it can also be easier on the eyes when working in low-light environments. Here’s a step-by-step guide on how to enable Dark Mode on your Mac in MacOS Ventura.
How To Enable Dark Mode On a Mac – MacOS Ventura
Step 1: Click on the Apple logo
The first thing you need to do is click on the Apple logo located at the top left corner of your Mac’s screen. This will open the Apple menu.
Step 2: Select “System Settings”
Once the Apple menu is open, click on “System Settings.” It’s the second option from the top.
Step 3: Click on “Appearance”
Once you’re in the System Settings menu, click on the “Appearance” option on the left. It’s represented by an icon that is a circle with half white and the other half black.
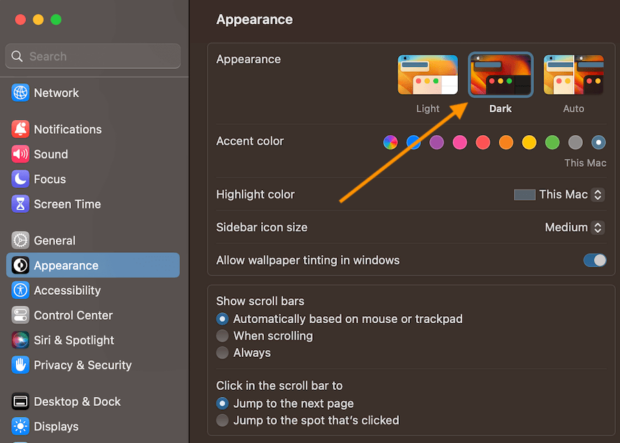
Step 4: Select Dark Mode
In the Appearance menu, you’ll see an Section called “Appearance.” Click on the option in the middle called “Dark” to enable Dark Mode.
Step 5: Enjoy Dark Mode!
Once you’ve selected Dark Mode, you can exit the System Settings menu and enjoy the new darker appearance of your Mac’s user interface.
If you have an older version of MacOS you can enable Dark Mode following similar steps but the settings are changed under “System Preferences” and then the “General” section and then “Appearance”.
Enabling Dark Mode on your Mac is a quick and easy process that can help reduce eye strain and make it easier on the eyes when working in low-light environments. By following the steps outlined above, you can enable Dark Mode on your Mac and start enjoying a more comfortable working experience.