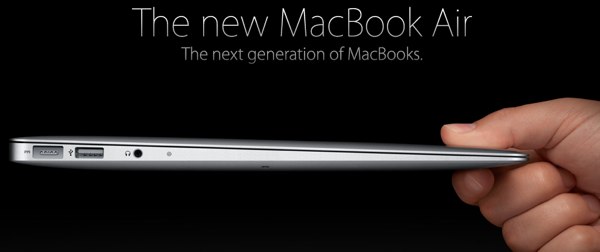
Tag Cloud
Get the most out of Spaces Part 1: Getting Started
Home

Apple noticed that despite their effort to continually increase the minimum monitor size of their iMac models to 20 inches that users were struggling to have enough desktop space to keep all of their running applications organized.

To help solve this problem, Apple has enhanced the desktop with OS X 10.5 Leopard by adding the technology they have titled Spaces.

The basic idea behind Spaces is to create a number of different desktops that users can switch between to help them focus on the application they’re currently working with.

But there is more to Spaces than just additional desktop area and over the next few days we’ll help show you what Spaces can do for you with 4 tutorials on how to get the most out of Spaces.

Enabling Spaces

To take advantage of Spaces you need to have the OS X Leopard installed on your Mac. From there, enabling spaces is just a few steps away:

  1. Click the Apple icon on the menu bar
  2. Select System Preferences…
  3. Click Expose & Spaces under the Personal Section
  4. Click the Spaces tab
  5. Verify the Enable Spaces box is checked
  6. OPTIONAL: Click Show Spaces in Menu Bar

Switching Spaces

Now that you’ve enabled Spaces you can get a quick feel for how it works by switching between the 4 default Spaces. There are two default keyboard shortcuts that allow you quick move from one Space to another:

  1. control + 1,2,3,4 - Each number represent the 4 default spaces. To move to Space 2 click and hold control and press 2.
  2. control + arrow keys - To move from one space to another hold down control and press the arrow keys to move from one space to another.

Once you’ve moved to a new space you can open applications and windows that will remain in that space and will help you stay organized. Play around and get comfortable with using spaces.

Don’t miss our future Spaces tutorials, subscribe to our RSS feed!

[Slashdot] [Digg] [Reddit] [del.icio.us] [Facebook] [Technorati] [Google] [StumbleUpon]

One of our recent tutorials explained how to get the most out of OS X 10.5 Leopard’s screen sharing capabilities through your home area network or accessing a friend’s screen through AIM. Another aspect of Screen Sharing is having the capability to get back to your own desktop when you’re away from home.

Lifehacker.com recently posted steps to allow you to gain screen sharing access to your home computer when you’re out and about. A rundown of the steps needed to gain Back to My Mac for Free access is listed below. For additional details on each step check out the lifehacker.com article.

  1. Enable Screen Sharing in System Preferences
  2. Setup FTP access
  3. Enable Access from outside the network
  4. Launch Screen Sharing from another Mac computer outside your home network
  5. Enter your home ip address
  6. Access your files

Following these steps will get you Back To My Mac access for Free.

[Slashdot] [Digg] [Reddit] [del.icio.us] [Facebook] [Technorati] [Google] [StumbleUpon]

We recently explained how the new iChat allows users to share their screen over the internet with other Mac OS X 10.5 users but that isn’t the only nice feature about iChat. One less known iChat feature is the ability to easily send SMS txt messages to your friends and family’s cell phones.

It seems that as mobile phones have become more and more common for people of all ages, so has the use of txt messages between individuals of those cell phones. With iChat, you can carry on a conversation with your txt messaging contacts without the phone.

After logging into an AIM iChat account, click File and then Send SMS. A new window will pop up and ask for the number you’d like to send a message to (US phone numbers only).

Be sure to include the area code of the phone number and click OK. A traditional chat window will appear. Type your message and send it. The SMS txt message will be sent to the phone number you entered. Any response from your friend or family member will appear in your chat window as if you were sending instant messages over the computer.

If you continually go over your allotted number of text messages, you may want to start sending some of them from your computer.

[Slashdot] [Digg] [Reddit] [del.icio.us] [Facebook] [Technorati] [Google] [StumbleUpon]

One of the greatest enhancements to web browsers over the past few years has been the addition of tabbed browsing. It has helped organize my web browsing experience and allowed me to easily keep track of the sites I was exploring.

But, even though tabbed browsing is a feature I use often in Safari, there are times that I find myself with a number of separate open Safari windows that seem to be taking over my desktop. I’ve often wondered how I could solve this problem after I’ve already created it….

Thanks to Safari no matter how many windows you have open you don’t have to loose hope of keeping control over your browsing experience. Safari lets you retake your desktop from the browser windows!

In just two clicks you can take the endless number of open browser windows and merge them into one. A tab will appear for each website that you had opened in separate windows and you’ll once again have control of your desktop.

To merge the Safari windows into one, select Window from the menu bar and finally select Merge all windows. Then witness the seamless transition as the windows merge into one with a tab set apart for each website.

Interestingly enough, the ability to pull a tab in Safari out to its own window often exists (But who really wants more windows?). To pop out a tab, select Window from the menu bar and then select Move Tab to New Window

The current tab will pop out to a new window and quickly clutter up your desktop!

Check out our other Safari Hints and Tips

[Slashdot] [Digg] [Reddit] [del.icio.us] [Facebook] [Technorati] [Google] [StumbleUpon]

Now that Maciverse.com author Dan is the proud owner of a Macbook Air (MBA for short), he’s also been going without his favorite DVDs. We’ll overlook the fact that he also owns a large HDTV and pretend he would really prefer to watch his movies outside in the shade on a beautiful spring day. Not only does the MBA suffer from not having a DVD drive, it also doesn’t have a lot of space for a movie collection. But don’t let that stop your fun.

For about the same price (depending on the model) as the MBA Superdrive, you can buy a slingbox. This lovely little device connects to your normal Cable/DVD/DVR output and to your network and lets you watch whatever is playing over your network with its SlingPlayer software. Depending on the brand of DVD/DVR/Cable Box, you can even control it from your computer as if you were pointing the remote at it. It can even be connected to an Apple TV. However, it doesn’t have wireless networking capabilities and that might be a drawback if your wireless router is on the other side of the house (or on a different floor). Also, once your movie is over, you will have to get up from your shady spot, go to the DVD player and put in another DVD just as if you were watching in your living room. So it doesn’t give you any type of media library (unless you connect it to your DVR or Apple TV). But all in all, a Slingbox is a very simple way to keep watching on your super slim Macbook Air. We’ll have a few more recipes for turning Dan’s MBA into a movie machine in future articles.

[Slashdot] [Digg] [Reddit] [del.icio.us] [Facebook] [Technorati] [Google] [StumbleUpon]